
UV
Cured Finishing for Guitars
By Brian
Howard, luthier
Magnolia ,
DE
I have been finishing wood my whole life. Part of my business for several years
was contract finishing for small guitarmakers all over North America and I still offer complete finishes on a limited scale. As such I
was very well versed in all manner of sprayed finish systems like Conversion
Varnish, Epoxy Urethane, Nitro… And I must say that all that experience was
only of limited use with this material and system. I do however feel this is
the future, soon shops will be limited to CA repairs and water based systems for complete finishes (which
really do not work well on guitars in my opinion) or they will need to go UV.
So I have prepared this article to help guide you into the world of high
quality and acceptably thin UV cured guitar finishes.
There are a few things to understand first. These systems are rarely
ever solventless (100% solids). They are far from odorless though there really
aren’t any toxic fumes (smells like fiberglass and hot plastic). As with any
spray finish, atomized coating should never be inhaled. They also do not cure
instantly.
The first thing you will need is equipment. This will consist at the
least of a UV curing lamp, safety gear and decent spray capabilities. I do
recommend an explosion proof fan because while these systems are touted as
solventless that is not always completely the case so better to err on the side
of caution! There are a few companies offering curing equipment and most of the
standard offerings are handheld or designed for mount over a conveyor belt. UV
“ovens” like those used by PRS and others have become more available but are
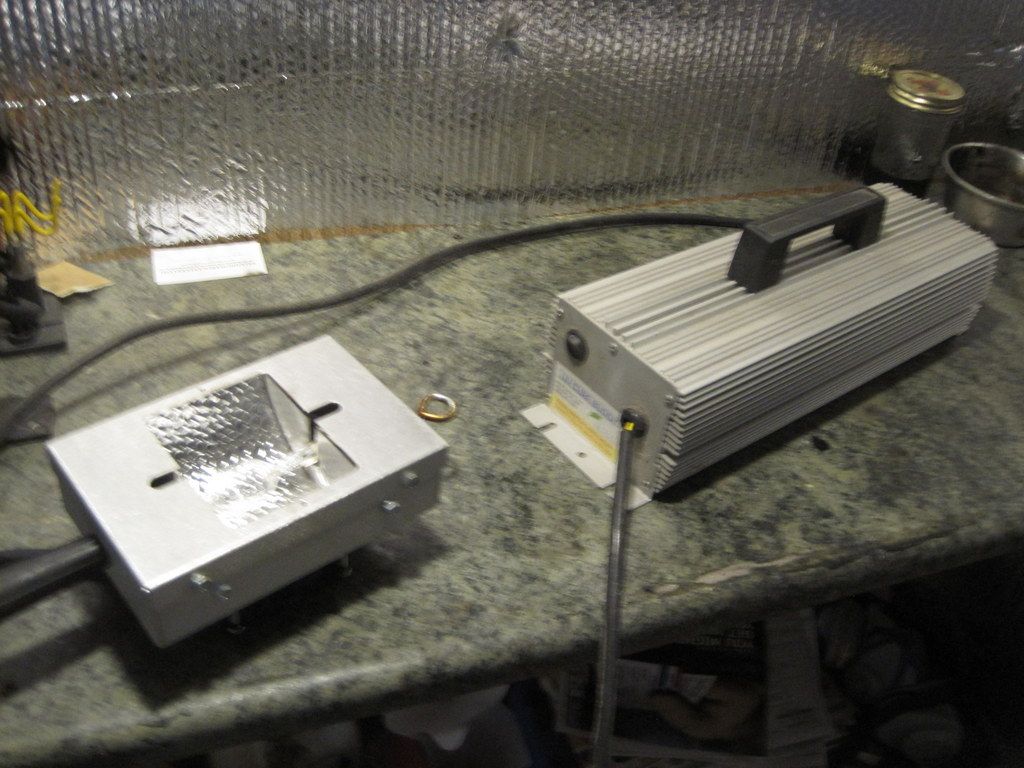
expensive and usually configured for a certain model of guitar . Here I use a handheld
system made by UVIII called the Cure Buddy. This is the minimum set up for this
work and is very simple. A ballast and an emitter. Shown here is my setup and
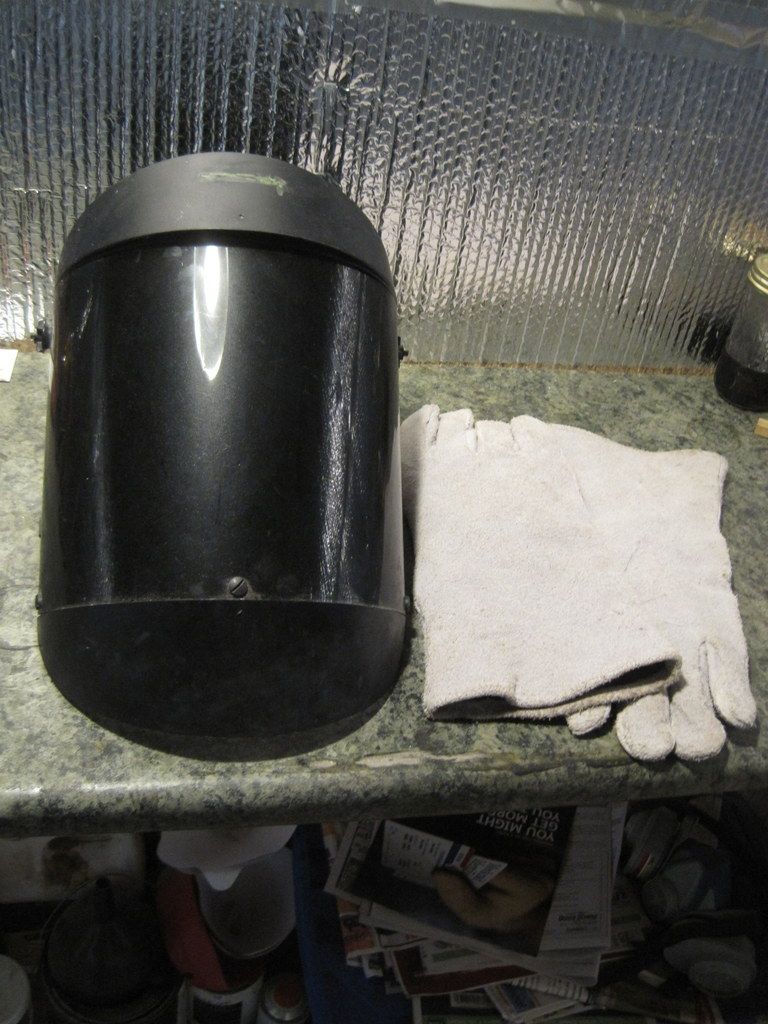
the required safety gear. Yes the welders gloves are needed, not just to shield
from UV rays but heat as well, the emitter gets very hot!!
***SAFETY NOTE, UV RADIATION EXPOSURE
MUST BE TAKEN SEROUSLY!!! ALL EXPOSED SKIN MUST BE PROTECTED. YOU MUST DRESS
VERY MUCH LIKE A WELDER TO PROTECT AGAINST THE RADIAION!!! EXPOSED SKIN WILL
GET RADIATION BURNS!***
UV emitter and ballast
Safety gear
There are different types of UV cure materials available and almost any
polyester blend can be made UV curable by adding a photo-initiator. You want a
system engineered for musical instruments and not floors or boats….. those are
usually made with little regard to achieving a thin final film and will have
vastly different flexibility than we want here. Even then there are a multitude
of choices. There are UV only and dual cure systems. UV only must be cured by
correct UV exposure. Dual cure will continue to chemically cure after exposure
ensuring complete curing but will typically not completely self cure without
UV. While dual cure solves one problem it introduces new ones like needing to
clean equipment immediately, the need to mix components and storage of catalysts that will
completely kick off if any dust or contaminate gets into the container. UV only
on the other hand means your exposures must be absolutely complete! Uncured
material at the bottom of pores etc will cause problems a few months down the
road. In the end after trying both I opted to go with UV cure only and skip my
perceived hassles of the dual cure system.
Your finish system will start with an isolation sealer of some sort to
seal oily wood usually called an “Isolante”. This is critical on any oily wood
and recommended for all work no matter species. Any oil present in the wood
will cook out into the finish during curing if this is not used. It does not
matter that the surface was cleaned directly before application. These wood
oils can affect curing, clarity of the finish and adhesion. There are UV
versions and chemical Cure versions I use a chemical cured two part in this
article and we start with that coat already applied as it is a straight forward
spray sealer application. Follow your manufacturer’s instructions here.
This is scuffed with 220 paper to knock down any raised grains and
de-gloss the surface. This coat is typically thin, .5 mill on average so be
careful not to sand through or you must reseal! You may think you want a finer
grit here….. You do not! These materials are all solely dependent on mechanical
anchor between coats. Fine sanding will lead to de-lamitations and blisters down
the road in curing of subsequent materials.
Now we proceed with the pore filler. I am
using a Cardinal product here. This product is a thixotropic jelly. I tend to
like this product for its ease of application without a sticky mess though it
is a bit more finicky to cure than some of the others I have tried. This
process will take 3-4 coats on average wood and wood with deep grain like swamp
ash can take 6 or more. Somewhere in the marketing lit or perhaps a salesman
told you this is a 2 coat process….. And maybe, if you really glop it on extra
thick. But we want thin finishes!! So we must take time to build the filler up.
Another reason to not do 2 thick coats is the sanding. While the product sands
incredibly easy when applied thick it must be sanded back hard. This leads to
sand through and bare wood which must be sealed with isolante again and
sometimes re-filled. This can become a vicious feedback loop costing lots in
extra time and materials.
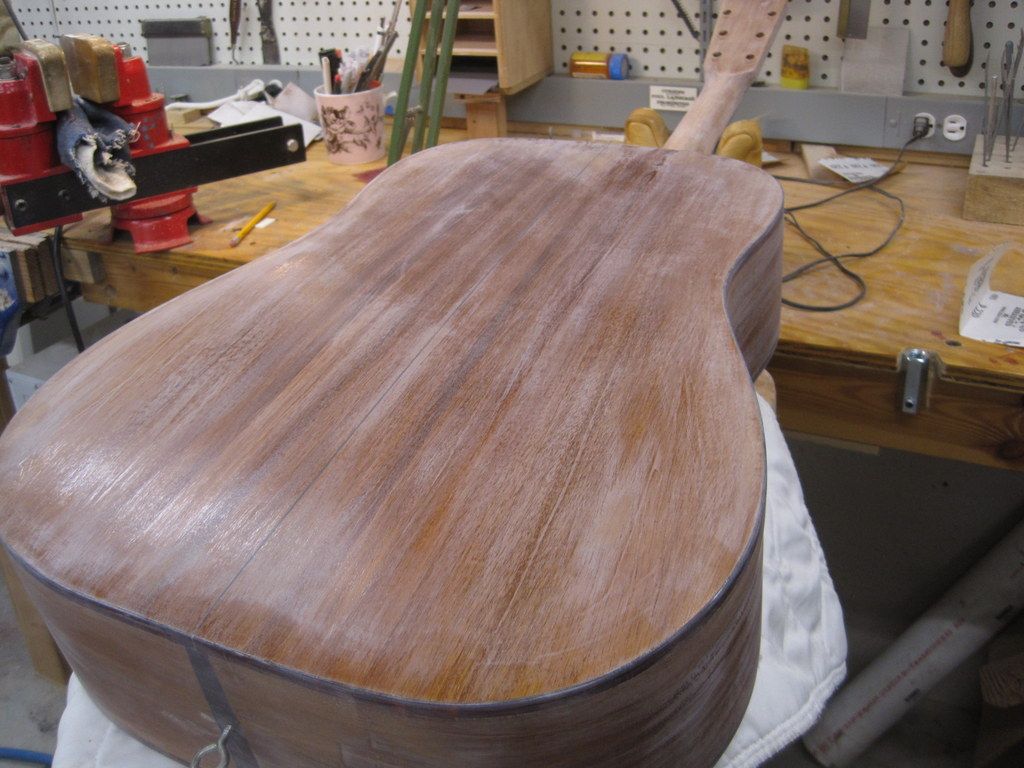
The first major difference between
conventional finishing and this system comes up now. Unlike other finishes
where the entire instrument is done at once here it is much better to work on
one surface/section at a time. This is an acoustic so my sections are back,
treble side, bass side & neck. I do electrics in a very similar manner.
Concentrating on sections like this makes application less messy and makes
complete curing with the emitter easier. This routine will be used all the way
through the clear coats as well.
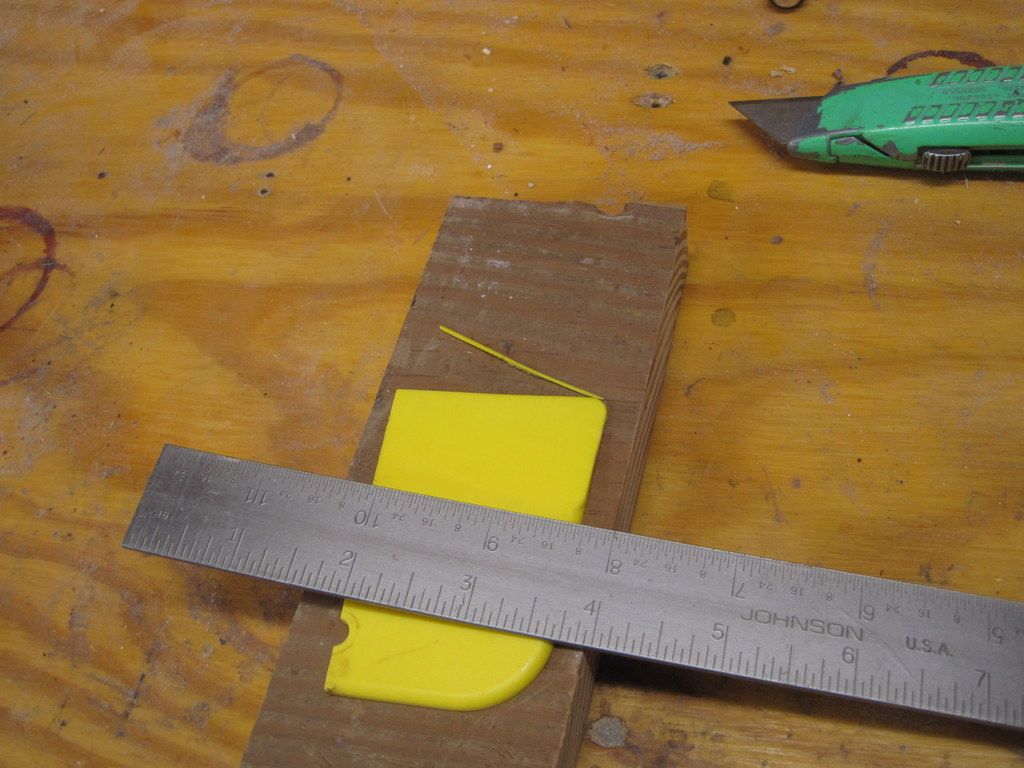
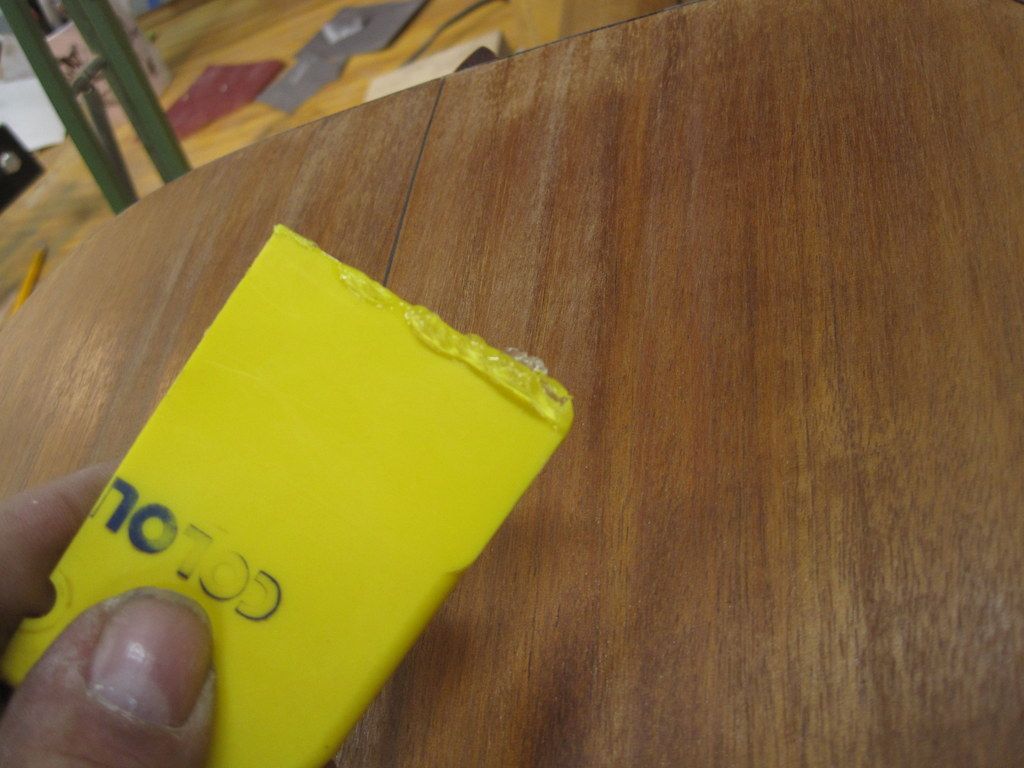
For application of the filler I use a plastic spreader like for bondo.
The key is keeping the edge keen by trimming it as it wears. Wiping it on with
a cloth or paper towel at this point tends to lead to bits of rag fiber trapped
in pores. A bit of jell is scooped up and spread evenly across the back
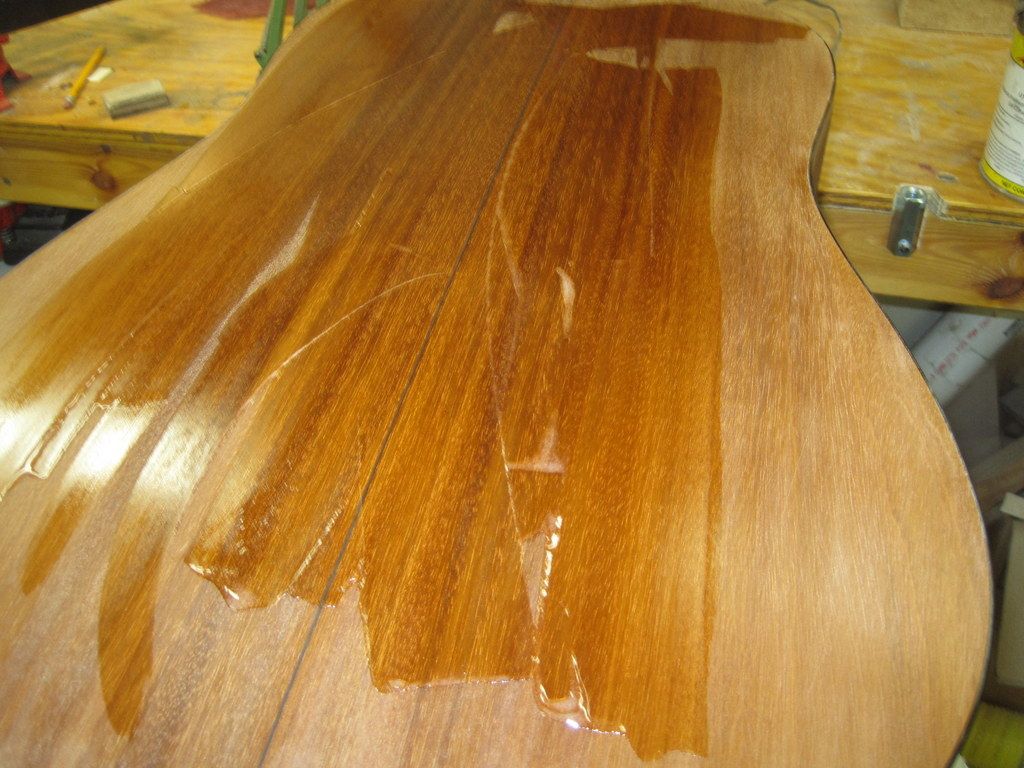
For this first coat final spreading should be done with the grain and
using the spreader at a low angle drag it out as smooth as possible. You mainly
want it in the pores with the surface looking kind of wet. A few light trails
from the edges of the spreader are OK here.
Now it is time to cure. Most think this process is instant, I know that
was what I expected. It is in fact not…. The back will take 4-5 minutes to cure
as will each of my designated sections as they are about the same area as far
as UV light is concerned (see diagrams under Clear coats). This is the main
reason to break the work down into smaller bits. Waving a UV wand steadily and
evenly over every surface of a guitar for 20 minutes at a stretch tends to lead
to uneven curing due to fatigue, both mental and physical. Not to mention the
gyrations needed to climb under and around a hanging guitar to get even
exposure on every surface.
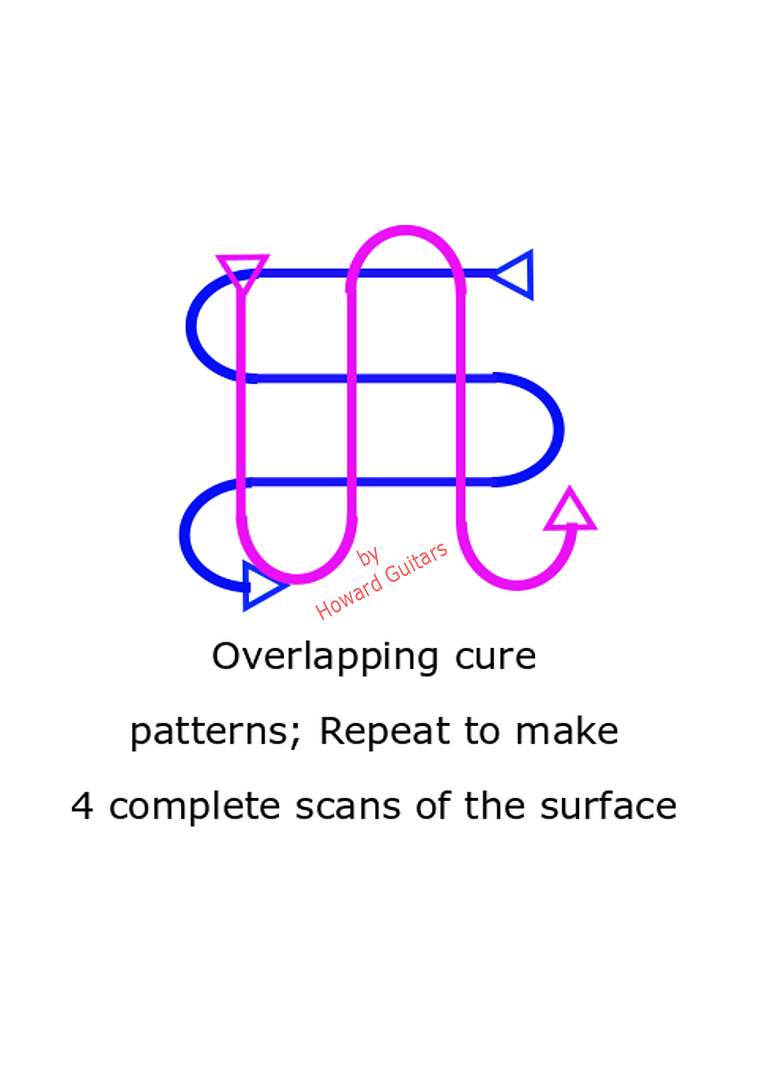
The following curing process is used
at every stage of the finish.
The emitter has a curing foot print determined by its size, power &
distance from the surface. To get the most even cure the quickest I have
developed what I call the “4-Spray” technique. I use the emitter as if it were
my spray gun and apply my rules of “4” which are;
Using a pattern just like you would
with your spray gun with minimal pattern overlap go back and forth over the
surface and then up and down. You will scan the surface 4 times, twice E-W and
twice N-S. You will do this at approximately ¼ the speed you would normally
move a spray gun. This will take at least 4 minutes. Do not get the emitter any
closer than 4 inches to the surface ( 6 inches works very well).
If you have a decent sense of smell you will smell it when the filler finishes
cooking off. That is due to the heat generated by the curing process. All the
UV radiation is converted to heat as the components link. At this point the
surface will be quite warm to the touch! You do not need your gloves to touch
it but you should be able to run a finger in your leather glove across it and
not leave a mar. If it leaves a mark of any type, the smallest smudge, you are
not done curing. This will take practice and is especially important in the clear coats.
Curing times are not set in stone. There are differences in materials
and how they cure. Some materials cure quicker and easier as thicker films and
some as thinner ones. This something you will need to learn about the materials
you chose. Also the color of the wood underneath the finish and whether it
absorbs or reflects UV radiation will have an effect on curing times as will
any toners or dyes used such as sunbursts etc. Ebony for example absorbs UV and
therefore makes the coatings take longer to cure. So watch for this on
fretboard edges etc.
Now back to the process itself. While the back cools I will apply to
another section and cure it repeating until all sections are done. Now the
surface is scuffed again with 220 using a cork lined or felt block. Only a bit
of leveling on any ridges left from the spreader. Again, careful not to sand
through or you need to reapply isolante! Cleaning between operations is done
with a vacuum using a brush attachment and a china bristle brush. Compressed
air as long as it is clean and dry may be used as well. Wiping with solvent
will drive sanding debris into partially filled pores and gaps at bindings
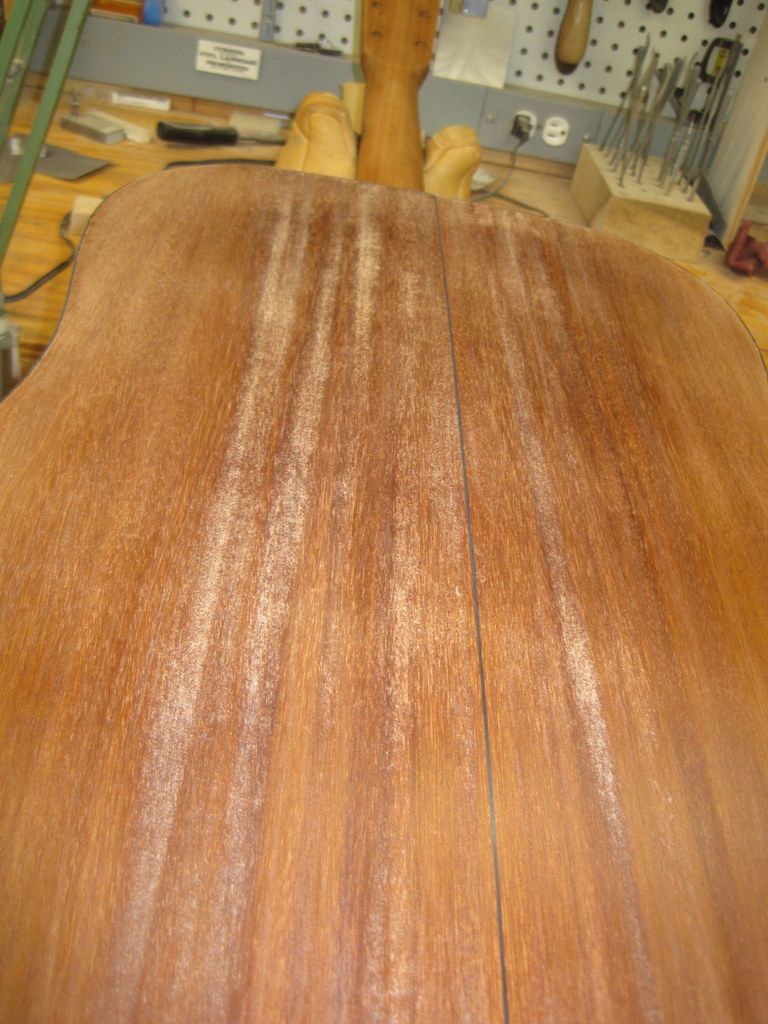
which will be white when finished. In
the case of this mahogany which is very average you can see how the grain needs
a lot more fill in areas.
We now have established a base to work from. The next coat is applied in
the same manner with an additional step. After spreading the jell I use a clean
folded white paper towel and mimic sanding in a circular pattern. Not really
wiping any jell off but spreading it out evenly. Here I show the amount
actually wiped off at this point. You can still see a lot of grain and some
minor ridges at this point.

This then cured again and sanded at
220. You will be tempted to think you can actually level sand this and apply
finish but invariably a sand through will happen and you will get set back. So
another coat is applied in the same manner as the second.
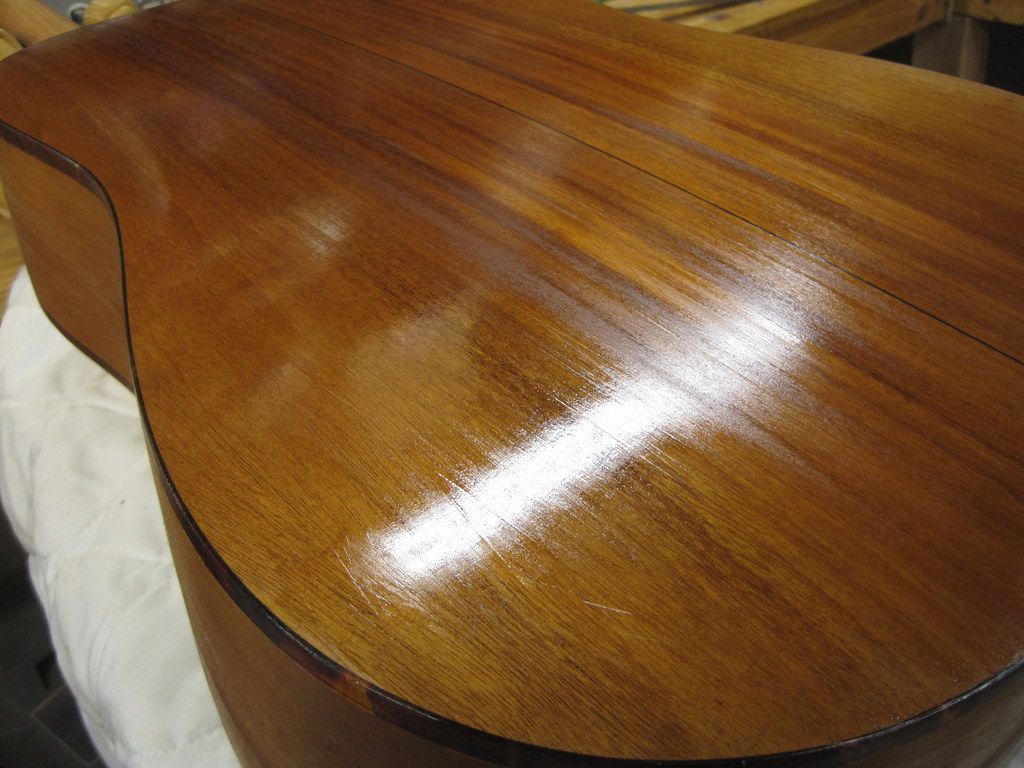
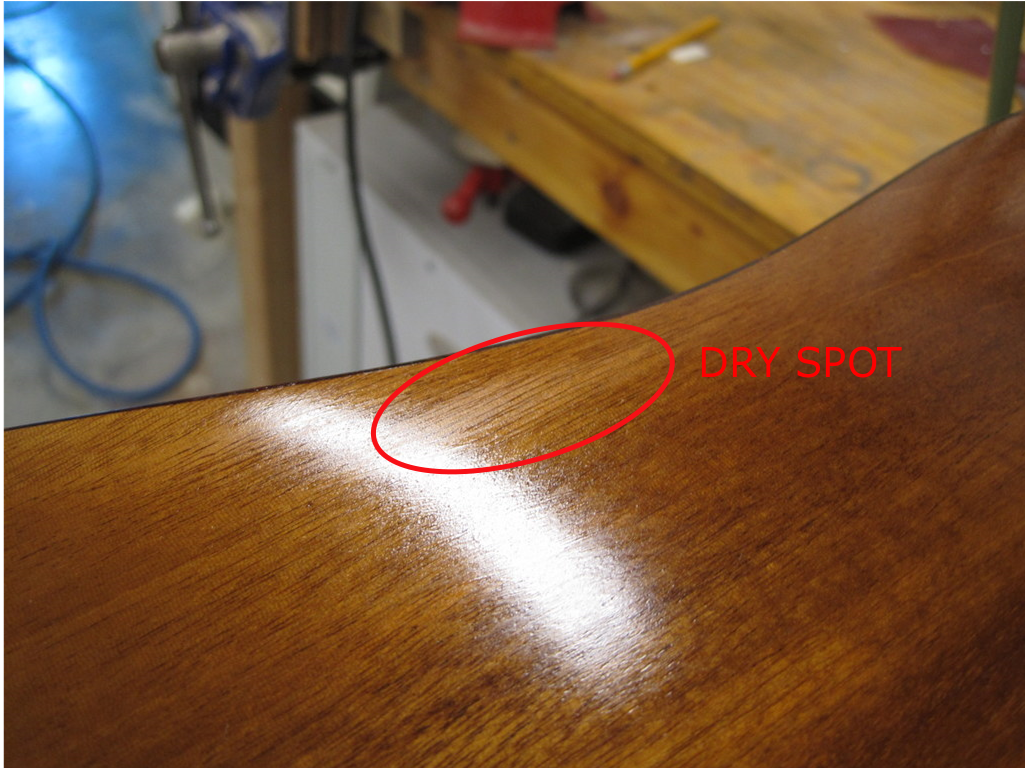
At this point be on the lookout for thin spots after wiping. They will look
slightly dull. These will likely be sanded through when you level out next Here
is one such spot by the edge just above the glare.
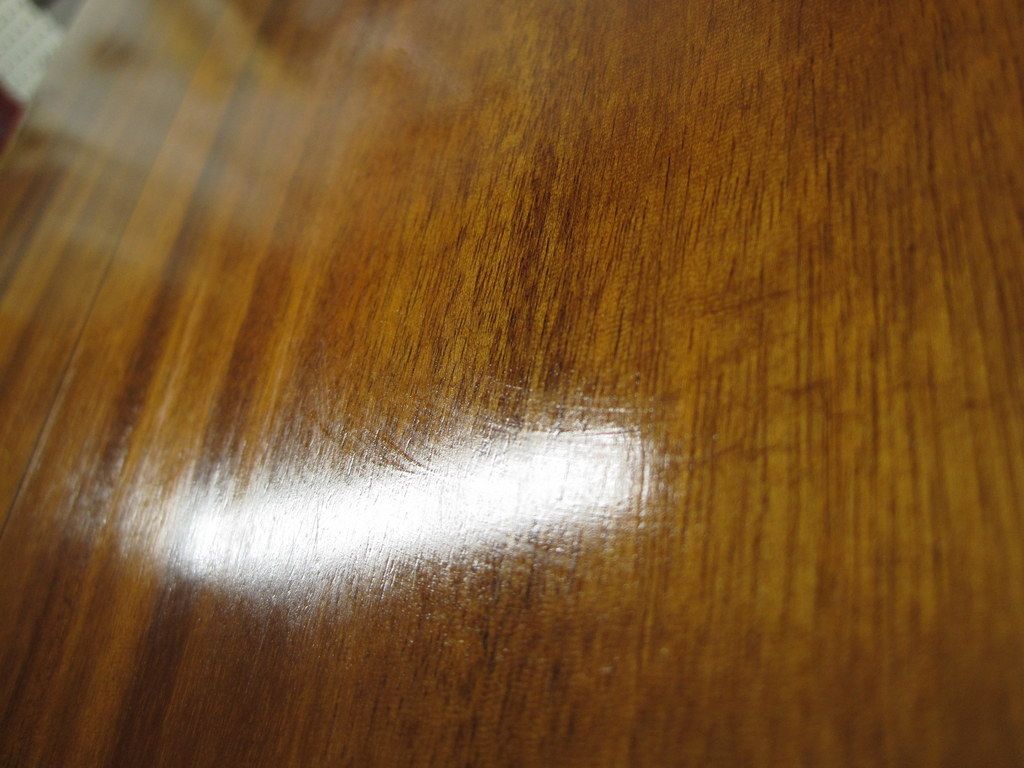
The surface should look like it was evenly sanded at this point before curing.
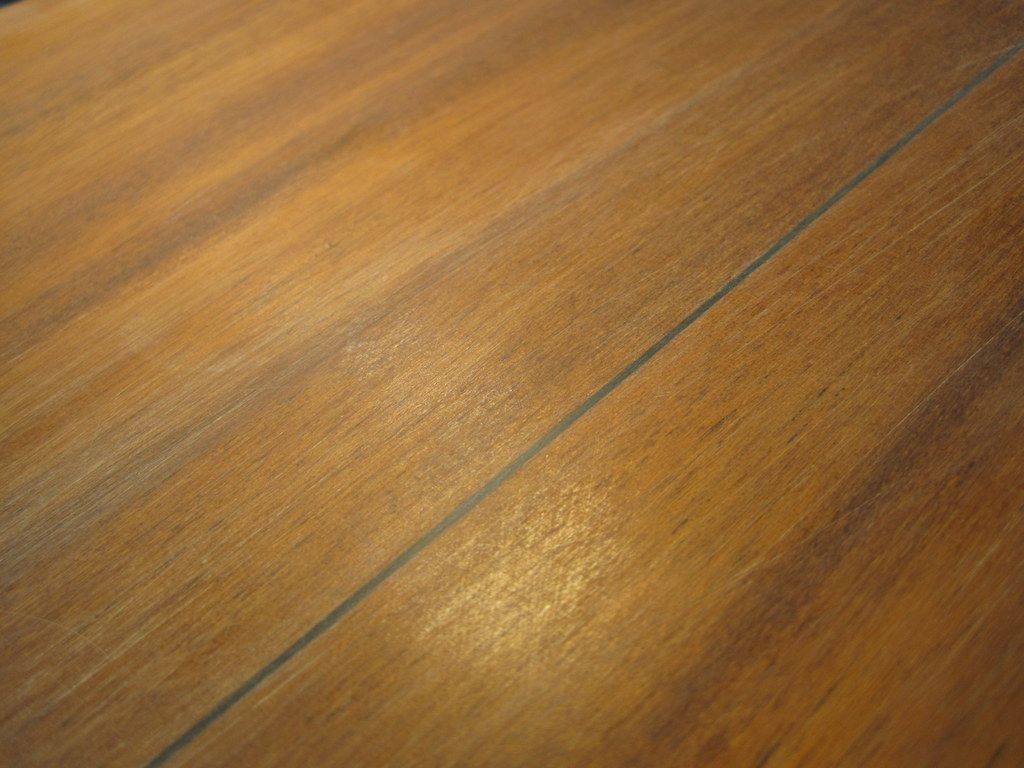
After this coat you may start to level sand carefully. While some spots
are fairly thick the pores and
grain may still be a bit low. This mahogany had some reverses in the grain that required a 4th application to get to a point it could be completely level sanded. Attention to detail here is critical. You want to get all grain and defects filled now! Small holes in your filler will repel the clear finish when you spray it. This is what we should have when ready for top coat.
grain may still be a bit low. This mahogany had some reverses in the grain that required a 4th application to get to a point it could be completely level sanded. Attention to detail here is critical. You want to get all grain and defects filled now! Small holes in your filler will repel the clear finish when you spray it. This is what we should have when ready for top coat.
Clear Coats
In this article I am using a clear coat from
Hentzen Aerospace, their PST908, it is the same as Taylor uses at their
factory. These UV top coats are different than anything you are likely to have
worked with including peroxide cured polyesters. They behave very different.
Unlike other polyesters they are not really thixotropic so they gain no flow
out from agitation via atomization. They are relatively thin viscosity for
something that is 75% + solids but have very high surface tension. The result
is a coating that is both prone to runs and exhibits lack of surface flow. For
a spray finish that isn’t typically what you want. The high solids do however
make up for this as so few coats are needed to get the job done. The high
surface tension will cause the material to gather at any edge and this is why
holes in the filler become almost impossible to deal with, they are surrounded
by edge.
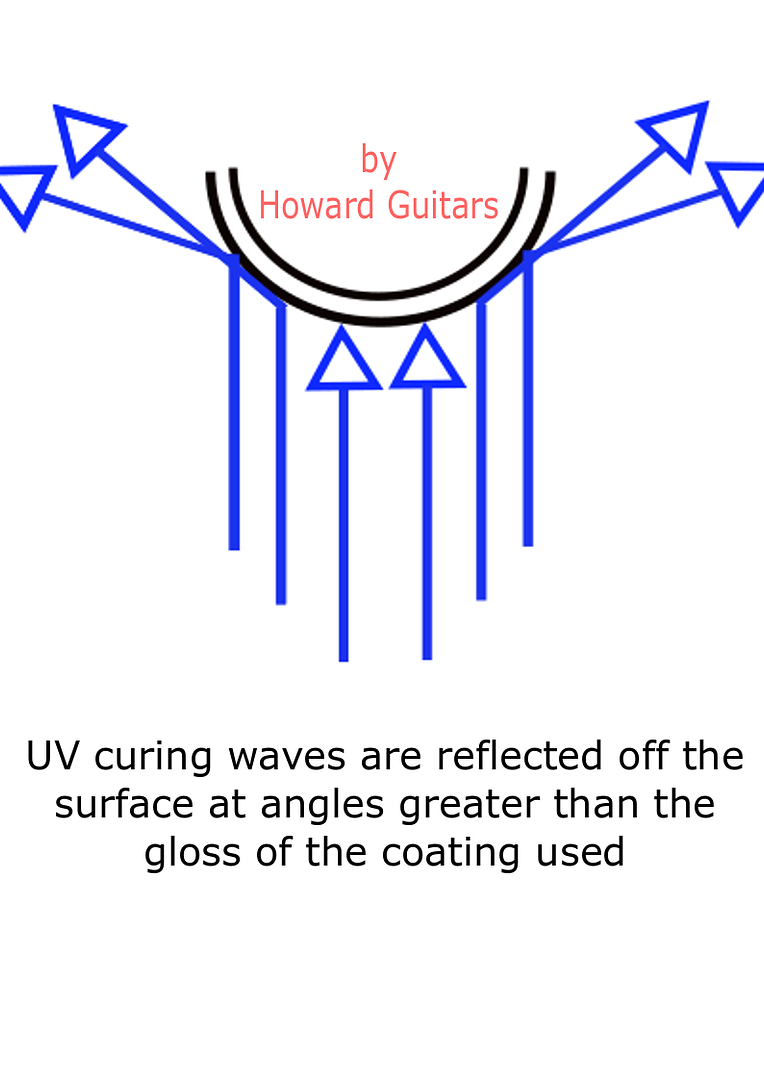
Curing clearcoats will be the same process but
the materials will act a bit different due to increased gloss and other
variables in formulation. Surfaces like the back and top of a guitar are
relatively easy and straightforward to cure. Sides and necks become a bit
tricky. Even curing here can be tough to achieve! This because the UV radiation
will impart energy into the coating only at close to a 90° angle. As angle
skews the surface becomes reflective and the UV bounces off! How much this
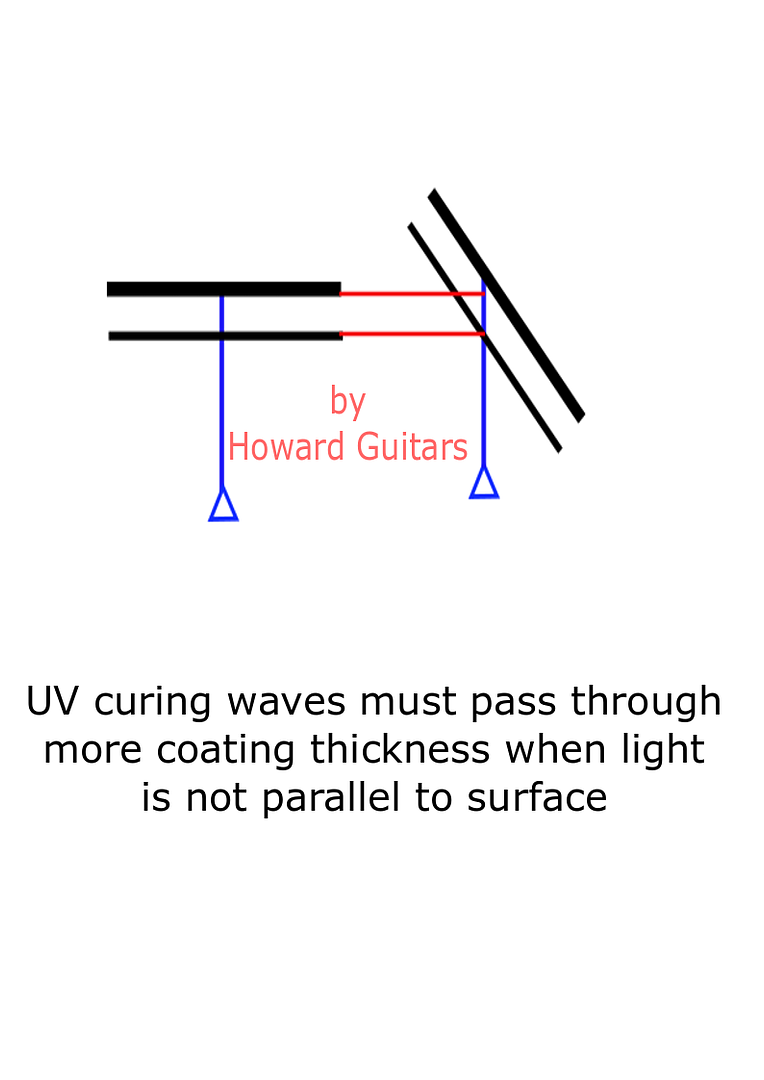
affects your coating will depend on the gloss of the coating. Another thing
that works against us when the light is not directly 90 °to the surface is the
fact that the coating appears thicker to any light that does penetrate upping
the exposure needed further still. This makes the waist and shoulders of the
body deceptively difficult to completely cure. This is also true of the neck.
Cutaways can be very tough when the neck is attached. My “4 Spray” curing
pattern helps assure maximum and even exposure.
While we have been solventless up until now, that is not the case
anymore. All of these systems use some solvent, sometimes pre packed and
sometimes added as needed. Just because it says VOC free only means free of
restricted or regulated VOCs, not all VOCs!! In the case of this material I add
the solvents as needed as I have done with all other finishes. MEK is the basic
solvent used and is good up to an 80° F spray environment. It is also the
recommended clean up solvent. The solvent used here is less than 10%. Just
enough to get decent atomization. Do not confuse atomization with flow! Over
reduction in an attempt to gain flow will result in a runny coating that cannot
be applied at a satisfactory build per coat. Judge atomization by droplet size
at impact.
Again I use my 4 sections but this time I start with the sides as this
makes clean up later easier and uses less solvent for that. I am using a
gravity feed HVLP Devilbiss gun with a 1.3 needle/tip and a standard aircap.
About 25 PSI flow through the gun when triggered and set for a 4 inch pattern
at 4 inches. I spray one coat exactly like any other material only slightly
thinner, about 2 wet mils. Wait 10 minutes for solvents to evaporate and the
coating will jell slightly. Spray another thin coat and wait another 10
minutes, then cure as before. The second coat here is very difficult to see the
spray pattern on so working in a robotic fashion when spraying is recommended. In
this manner build per cure cycle can be increased without compromising
inter-coat bonding and flow out increased. Once the sides are done the top and
back can be done at the same time to save time. And then finally the neck. Make sure to wait on the evaporation before
curing or you will get pinholes that will repel the next coat.
NOTE
Different brands of coatings will have varying
amounts and types of solvents you may need to adjust your flash times accordingly,
especially before curing. Some manufacturers also recommend stacking all the
coating and curing once. I highly recommend against that as it leads to sags
and increased build at the edges which can be problematic to sand out prior to
buffing.
A few words about spraying and curing
the different designated sections. After the sides are done and the top &
back are sprayed there will be some overspray that clings to the sides. We must
deal with this. This very important as all inter-coat bonds are mechanical!
There are two options for this and I will present them both. Each has its own
perils…..
1; We can deal with the by wiping it off with clean paper towels and
some MEK. Note this is done prior to any sanding! Once you start sanding do not
wipe with solvent, if you missed a bit of overspray with this method work it
off with some scotchbrite. Otherwise it will gum up paper and put heavy
scratches in your finish.
2; we can cure it with the UV but must
then be sure to sand it all off when we prep to re-coat or buff or you may have problems
with surface texture returning after buffing or grey spots in your finish. This method increases the sanding
needed to prep which can lead to sanding through to the filler if
you are not careful. Remember I am working to get the thinnest film possible.
My personal choice is a combination of
the two, wipe down between clear coats and cure & sand after final clears.
After the first set of clears we have approximately 1-1.5 mills of filler sealer and 3 mills of
finish. This is now scuffed again with 220. I know some of you are thinking
this should be much finer but in this system that is not the case. Sanding too
fine between coats can lead to witness marks between coats when buffing. Keep
the sanding light but rough and quite thorough here. Make sure to get the
surface build at the edges. You can go over this with maroon Scotchbrite a bit
to remove any glossy spots in the spray texture that remains.
Another two coats of clear is applied exactly as before. If everything
went well we are now ready to level and buff the surface at this time. This is
not really the standard we are used to either. This material has a preference
for being sanded fine before buffing. I use an arbor and Menzerna
compounds and most other coatings need no finer sanding than 600 to begin the
buffing. This coating likes to be sanded at 1000 before I start with P204.
Thankfully one of the characteristics of this finish is easy dry sanding. I
have never been one to wet-sand a guitar….. water causes the wood to swell and
then the pores ghost back through very quickly. I start at 400 grit and sand
75% flat and then work up through 600, 800 & 1000 ending with a perfectly
flat surface. From here the buffing goes very quick and easy.
This method yields a 5-6 mill thick clear finish very consistently. It is tough but light, non yellowing and will not cold check.The entire process can be completed in a single day and it is very repairable quite quickly and easily with this same equipment and materials. Welcome to the future of guitar finishing.
This method yields a 5-6 mill thick clear finish very consistently. It is tough but light, non yellowing and will not cold check.The entire process can be completed in a single day and it is very repairable quite quickly and easily with this same equipment and materials. Welcome to the future of guitar finishing.
For those interested in a more in depth
understanding of this process I offer one to one hands on instruction here at
my shop. For info on that please contact me directly at Howard Guitars or call (302)310-2035
thx bri
ReplyDelete