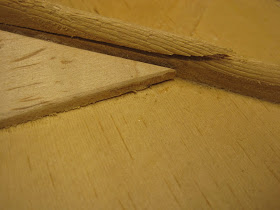
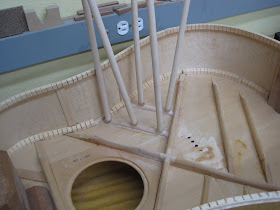
This project is good
illustration of why it is sometimes just better to pull the back off an
instrument to make repairs rather than work through the soundhole. Our project
is a late 80’s Guild D-30 with a Maple body and laminated Maple neck. The guys
who play these older Guilds are very dedicated to them and often will do what
it takes to keep them playing.
So here is our
current situation. This guitar was crushed pretty badly at one point. It looks
as if it was stepped on. Someone has already made some repairs some time ago
and actually did a really good job of getting the top back together. The
problem is the repairs were never really finished. The guitar came in strung
and strumming with a saddle that was way too high for comfort, over ¼” above
the bridge! Not the usual situation for an old acoustic where the neck needs
re-set. It was obvious that the top was still caved in.
A quick look around
showed the bridge was lifting, both sides of the X-brace were broken, some
finger braces were missing & none of the crack repairs had been cleated. If
this old guitar was going to keep playing it needed some real work. I very
quickly decided it was best to simply open up the soundbox so all the damage
could be clearly seen and easily repaired. So the first step was to remove the
bridge. I used my heat shields made of cardboard and foil, heat gun and
spatula. As always I like to work from side to side with my spatula completely
under the bridge as it makes for cleaner removal. I can see once it is off it
was re-glued before.
Next I need to remove the back binding. This is done
carefully with my heat gun and a small spatula. Heating a section and working
it loose and then holding the section in position with some blue tape behind me
as I go. If you do not keep the binding close to the body as you remove it the
soft, warm plastic will cool in a shape other than what it should be to fit
back on nicely when I put it back together. Once the binding is loose and has
cooled so it retains shape it can be put aside.
Now I can remove the back. The joint is still warm from
pulling the binding so it doesn’t take a lot more from the heat gun to get it
going. I start at the waist from inside the box with my thin spatula. This
helps prevent splitting the lining and pulling large parts of it off with the
back. I use a piece of wooden dowel to keep the joint open as I work and to
help pop the joint loose as I work around now with my spatula outside. As you get closer to completing the removal
you must start to exercise greater care. It is really easy to split the last
6-8” of lining instead of separating the glue joint.
Now I can start to
look around and really see what there is to repair. Some of this would have
been almost impossible to find with mirrors and feelers and even tougher to
repair properly while the box was closed. Here we see the damage to the
X-bracing and soundhole reinforcement. Also notice the broken and missing
lining and loose bridgeplate.
Some of the finger braces are MIA and the tone bars were not
glued back on very tightly. You can also see how broken and crushed the top was
in these photos as well.
Next I will remove the bridge plate. It is in good shape but
as I already noted is loose. I can also see from outside when I pulled the bridge
that the top was crushed and fractured in between the bridge and the plate
which will require some attention as well. So with my heat gun and spatula
again I remove the bridge plate. This does not come off as clean as the bridge
because the spruce it is attached to is very fractured.
Now I can start to actually make some repairs. First I must
prep them so I get good solid glue joints, otherwise all this work will be for
nothing a few months after the instrument is back in service. Any old glue must
be cleaned out of the failed joints and oxidation cleared away so the glue can
get a good purchase on the wood. In order to do this I put some 150 sticky back
sandpaper on my spatula and sand the joints like so one side at a time
Now using my spatula I can start to work glue into the
cracks and joints. Making sure to get the entire surfaces inside coated.
My go-bar deck is very large. I can easily fit complete
instruments on it and this will make clamping everything back as it should be
very easy. I use my arched cauls that I use for building my tops and start with
the main breaks and loose places on the X-bracing.
Next I glue back together the shattered wood fibers under
the bridge plate using a thin Plexiglas caul. And take care of the last break
in the X. I also make and install replacement finger braces and take care of
the rest of the loose braces in like fashion. I also place a few wood cleats on
some of the longer cracks, replace the pieces of broken lining and reinstall
the bridge plate.
After all that is done I reinforce a few areas with some
muslin cloth soaked in glue. This is a technique I picked up from a violin
repairman and it works well in certain situations adding strength but not
weight. This is what the box looks like all repaired and ready to have its back
put on.
Unfortunately the back will not just drop back on. The sides
have sprung out of shape a bit and must be pushed back into alignment. If this
is not done carefully and precisely the binding will not fit on properly and
the job will look and feel very bad. This is the reason I think most shops do
not go this route and opt to try and find and make these repairs through the
soundhole. Here is what it looks like with the back just laying on the box.
I have a jig set up to make this job fairly quick and easy.
It is comprised of a plywood base and clamps made from 5” aluminum angle.
I wish I could take credit for this rig but I saw the idea on Frank Ford’s
page, Thanks Frank! I have wooden cauls made with the proper offset for the
binding channel. Here is a view of one of the clamps.
I also use a collapsible spreader as needed to push outward
on the rims as necessary. Using the back as my guide I install clamps as needed
and adjust them until I have a perfect fit. I also use a tapered wedge under
the neck where it joins the body to get the neck back at the proper angle. Here
is the body all jigged up and ready to have the back reinstalled.
Now the binding can be reapplied. First I just hold it in
position with some strips of masking tape. Starting at the end graft I
carefully work Ducco cement into the joint about 6” at a time with a toothpick.
I want to get all the wood of the binding channel coated to get a good bond but
do not want a lot of squeeze out or mess as it will be difficult to get off the
lacquer I then use some packing tape to cinch the binding tight and hold it
until the glue sets.
Celluloid shrinks with age. That is why bindings pop loose
or crumble after many years. This is how much the back bindings have shrunken
in 25 years. I fit a small piece of new binding to close it up.
Here is our back after it is all back together. All I did is
a bit of buffing do clean up the work, there were no finish repairs done here.
This could be made to look truly as if it was never off with a bit of time with
the airbrush and buffer but this client is happy with the repair as it is.
Now I can re-set the bridge. But before I can do that I need
to make some repairs to the top under it. There are two sections where the wood
is either missing or to splintered for my liking so I will replace those
sections. First I cut some repair plates from some scrap spruce and outline
them over the areas I wish to replace. I then rout them out with my inlay
router to a depth just deep enough to give a good true glue surface. The plugs
are then glued in place using some magnets to clamp them.
Once these are dry they are leveled with a crane neck chisel
and all the old glue scraped off to provide a good clean surface to glue the
bridge to. I can then floss the bridge to fit the top using a piece of 180
sandpaper lined with tape on the back to prevent scratching. Once I am happy
with the fit the bridge is glued back on and the pin holes reamed.
Here it is all fixed up. The saddle height is very good and
will allow for a fair bit of adjustment as the guitar ages from here helping to
put of any additional work like a neck set for quite a while. Thanks for
following along and if I can ever help you with anything please feel free to
contact me, Thanks.


I have an old guitar I am busy refinishing. Currently the instrument is not very well braced.
ReplyDeleteThe sound hole is a bit too small for my hand to fit inside, though it does appear to have splits in the bottom-side joints.
What would be my best way to gain access to, and reinforce the top?
I have a variety of surgical instruments and mirrors that aid me when sound holes are too small for access. Sometimes you need to pull the back off to make proper repairs....every situation is unique in this game.
ReplyDelete